There are several ways of creating graphical ads and banners for the Amiga version of the Prevue Channel software. This guide demonstrates several methods I have tried:
The Amiga Prevue Channel software (ESQ) uses ILBM (interleaved bitmap) images for on-screen graphics, particularly graphic advertisements (referred to as “logos”), banners, and other uses, such as to block out a portion of the top video feed.
In addition, it seems to have accepted from a variety of different resolutions for graphics. Finding these resolutions are easily accessible by pressing the SLASH key during normal operation. The top portion of the screen should display “ViewMode = #” along with a measurement of the selected view mode.
A list of tested resolutions and color palettes are:
NOTE: Banner graphics are restricted to a fixed 8-color palette in version 7.8.3, regardless of how many colors are in a banner.
For the Personal Paint and DeluxePaint sections of this guide, I had to manually convert the images to work on the Amiga (as said programs are Amiga-exclusive.) I would not recommend doing this unless as a last resort (if nothing else in this guide worked for you).
Make sure your image is one of the resolutions listed above, then open the image in XnView.
Next, in the Image menu, select Change color depth and set to either 8 or 16 colors. I've found that 16 works best.
Save the image with IFF as the file extension (chosen from the dropdown menu.)
A similar process can be done using nconvert, which is a command-line utility:
nconvert -out iff -c 1 -colors 16 image.png
Copy the resulting file into a folder of your choosing and mount the folder as a hard drive with WinUAE or FS-UAE.
From there, your image should now open in either DeluxePaint or Personal Paint.
Since the earliest of versions, Photoshop supports exporting to an Amiga (or Maya) IFF image. Here, I will be using Photoshop 2023 on macOS Monterey, but with some behind-the-scenes testing, the steps should be about the same when working with older versions.
Start by creating an image that is 640 pixels wide and 160 pixels tall. The height shouldn't matter if you're making a custom banner (i.e. TVGBANNR.UV or PGWAWO.180), but is a requirement for graphic advertisements. Additionally, a width of 320 pixels wide is recommended for logos / graphic ads.
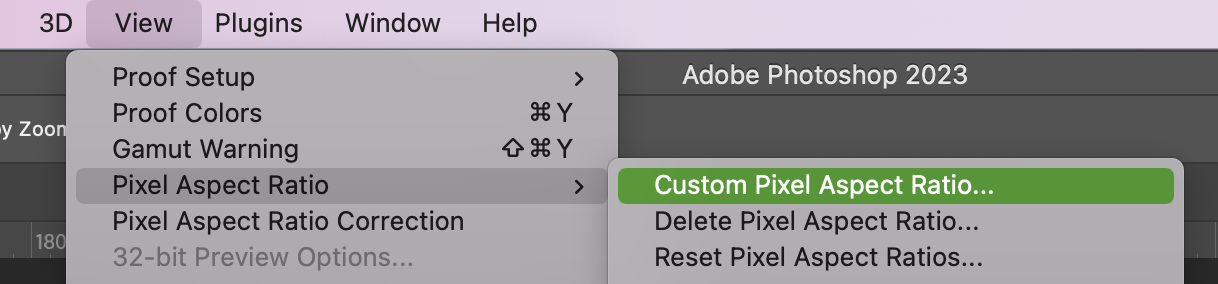
If you need reference as to how the image will be displayed on Prevue, you will need to set the pixel aspect ratio to 0.85. This can be done by going into the View menu, then selecting Pixel Aspect Ratio > Custom Pixel Aspect Ratio.
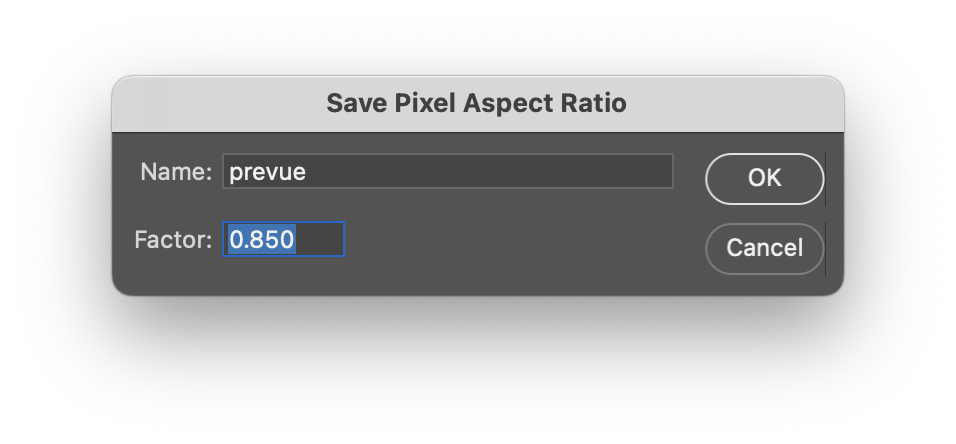
Set the factor to 0.85. You can also set a name for the preset if you prefer. If it does not show up right away, you'll need to make sure Pixel Aspect Ratio Correction is ticked.
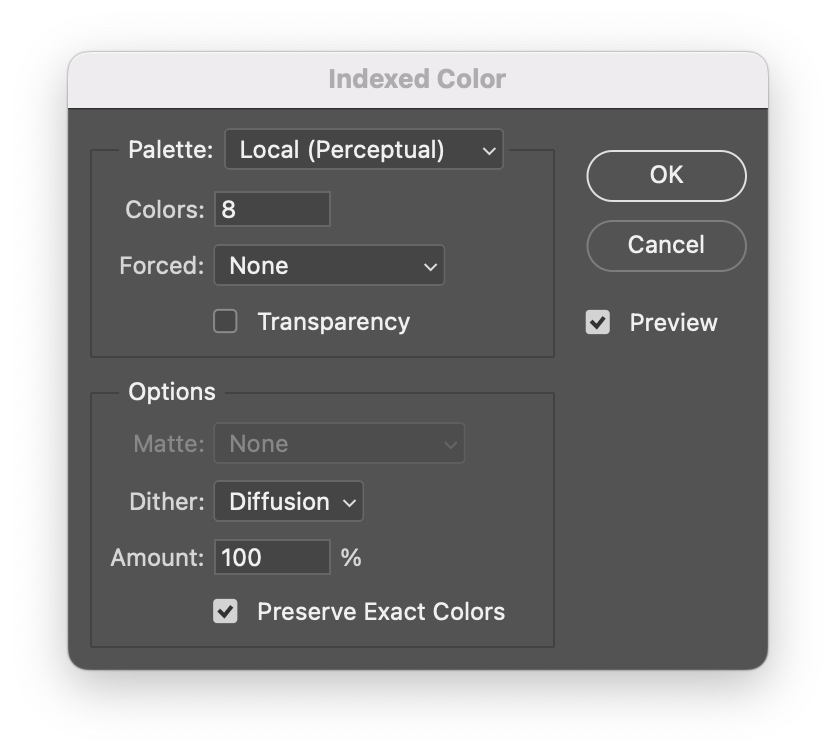
To reduce the color count, you'll want to open the Image menu and select Mode > Indexed Color. If it asks to flatten layers, click OK.

In the Indexed Color window, set the Palette to any of the 3 ‘Local’ (Perceptual picked for this example) options, set Colors to 8 (or 32 for logos/ads), and make sure Transparency is unchecked. Then, set Forced to Custom.
In the Forced Colors window, set the first four colors to these RGB values:
Additionally, I made a pre-configured palette file (in .PAL or .ACT format) that can be loaded by clicking Load from within the Forced Colors window. When done, click ‘OK’.
When back at the Indexed Color window, adjust the Options however you'd like. Once you're satisfied, click OK.
To save as an IFF, click on File > Save As (or Save a Copy).
Under format, choose *.IFF, *.RLE
Once you click Save, this window should pop up. Make sure the setting is set to Amiga and click OK.
Grafx2 is a free and open-source graphics editor inspired by DeluxePaint and other such programs.
If you aren't familiar with the program, you can make the banner in the photo editor of choice, being sure to stick to 640x160 (banner) or 320x160 (logo / graphic ad).
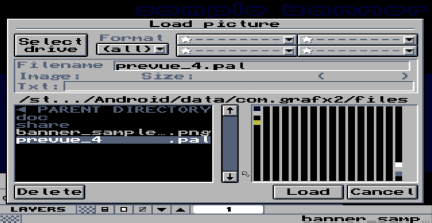
Open Grafx2 and click on the L icon to load an image. On Windows, the default directory might be AppData, so navigate to your home directory and open the banner you created.

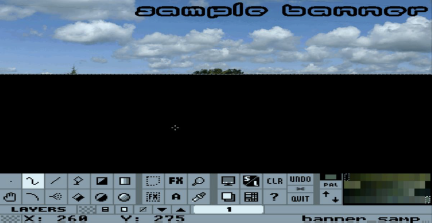
If done correctly, the banner should appear.
Next, download the palette file (if you haven't already), click the L icon again, and locate the directory you saved it in. It should have a .pal extension.
If it asks to discard changes, click Accept.
The banner should re-appear, however the palette will also be added into the image.
Click on the PAL button to pull up the Palette window.
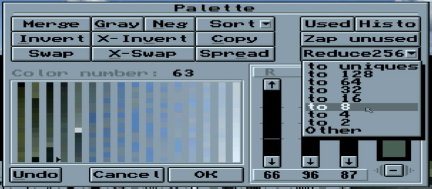
Reduce the colors to 8 (banner) or 32 (logo/graphic ad) and click OK.
Finally, save the file. Choose 'lbm’ to save with an ‘.iff’ extension.
ham_convert is an Amiga image converter programmed in Java. As a result, it requires the Java Runtime Environment to run.
Once installed, load the JAR file, either from one of the provided batch scripts or from the command-line:
java -jar ham_convert_1.x.x.jar
(replace the x’s with the version number in the filename.)
Open your image under Source file, then Choose Amiga OCS 32-color indexed for the Mode.
Files converted with ham_convert will not automatically work with Prevue (currently, if it ever gets fixed in the future this step might not be required), so you will need to change a few bytes with a hex editor. Here, I will demonstrate the process using HxD, a freeware hex editor for Windows.
Once the .IFF file is opened, you will need to remove the bytes starting with CAMG...and ending before CMAP. (should be approximately 7 bytes) Select the bytes and press backspace. If it alerts about the filesize changing, accept it and save.
Program by Cloanto for AmigaOS. Available bundled with Amiga Forever (which makes sense as Cloanto made both) or standalone from the AMIStore and AmiSphere online storefronts. The version used in this guide is version 7.1c, which is available for free without support from its official website.
DeluxePaint is a graphics program by Electronic Arts for the AmigaOS and MS-DOS platforms. This guide was initially written for use with DPaint III by DJ Saunders, however this guide uses DeluxePaint IV as it's the only one I have on-hand at the moment. If you're having trouble locating a copy, it can be found bundled with ClassicWB 68k, if you can manage to get that installed.
When you start DeluxePaint, you should see the Screen Resolution dialog. Set the mode to Low Res Laced (320x400, 32 max colors).
Click the Use button to open DPaint.
Next, hold down the right mouse button and move it to the top left of the screen to open the Picture menu.
Select Load
Navigate to the directory where you saved it and copy into the Banner folder in the extracted Prevue zip archive. (if you set up emulation using, that method.) Delete or rename the pre-existing TVGBANNR.UV file and replace it with the one you made, being sure to rename the file accordingly.
If you don't want to replace the file, you can find Banner.ini In the root directory and change the Banner= value to whatever the file is named followed with its extension.
7.8.3 is hardcoded to a specific file (PGWAWO.180). If you are using this version, rename the file accordingly and place it in the root of the Prevue directory (or disk.)
To load a custom graphic ad or logo, put your output .IFF image into the Logos folder in the Prevue disk/(extracted) zip archive. Then, in the root of the Prevue directory, append the location of your image to the end of LOGOS.LST:
Logos/output.iff,
From there, you can now refresh the on-screen graphics in a few ways:
Manually: If Prevue is still running, hit Esc, go to Special Functions, then Reboot System. When prompted, hit Y.
Automatically: TBA.
Your graphic should now appear.
