This guide teaches you how to set up an emulated Amiga with WinUAE running the Prevue Channel software. A guide for FS-UAE can be found here.
Download the latest WinUAE binary. It doesn't matter if you intend to install it or extract it into a folder. Once it's finished installing or extracting, launch it.
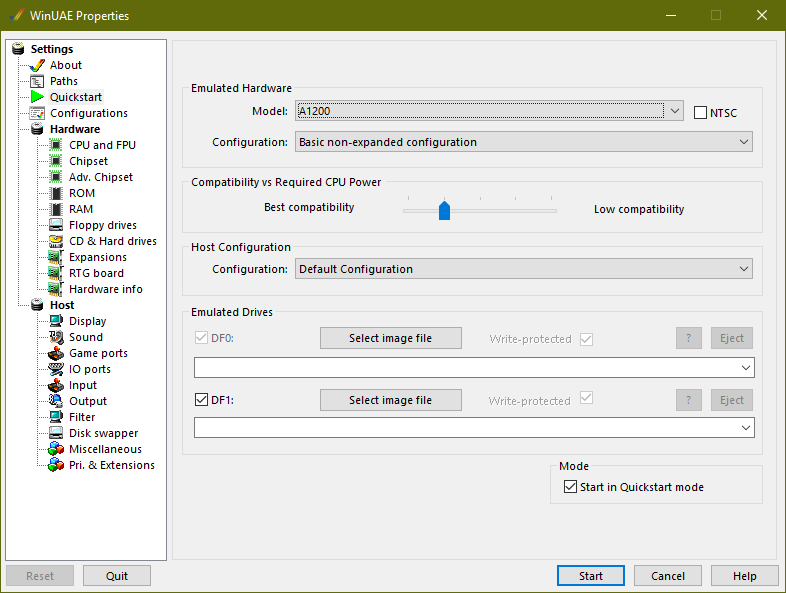
When launching WinUAE, click OK on the dialog box, then a window will appear with lots of settings.
On the sidebar, you'll want to select the Paths option, located above Quickstart. The contents in the window should change to display a bunch of different locations to different folders.
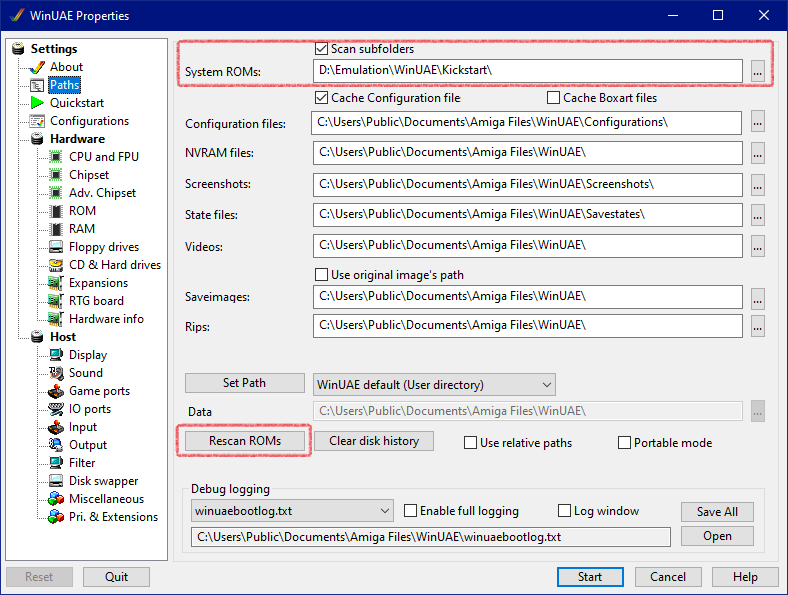
In the text box labeled System ROMs, select the entire file path listed, copy it into your clipboard (either right-clicking and selecting ‘Copy’ or pressing Ctrl + C) and paste it into the Address bar in File Explorer. (click the Address bar and press Ctrl + V)
From there, drag and drop (or copy and paste) the Kickstart ROM from earlier. Once again, if you don't have it, then you will either have to purchase Amiga Forever or track down a copy online. Since it's part of a still maintained and paid bundle, I cannot legally redistribute it.
Go back to the WinUAE Properties window and click the button labeled Rescan ROMs. From there, it will scan the folder for new ROMs and a new window should pop up with the ones it has found.
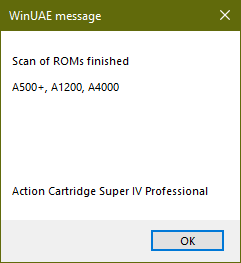
If you can see A500+, A1200, A4000 in the scan, you're good to go.
Emulating the Prevue Channel requires some changes to the Hardware to work properly.
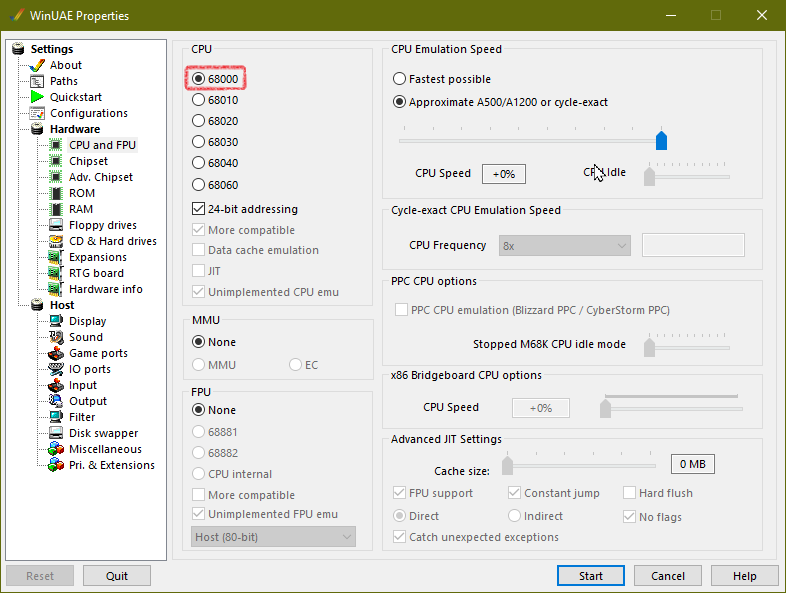
Under CPU and FPU, if it's not already, set the CPU to 68000. Also make sure that 24-bit addressing is checked and MMU and FPU are set to None. If the boot sequence is too slow for you, set the CPU Emulation Speed to Fastest possible.
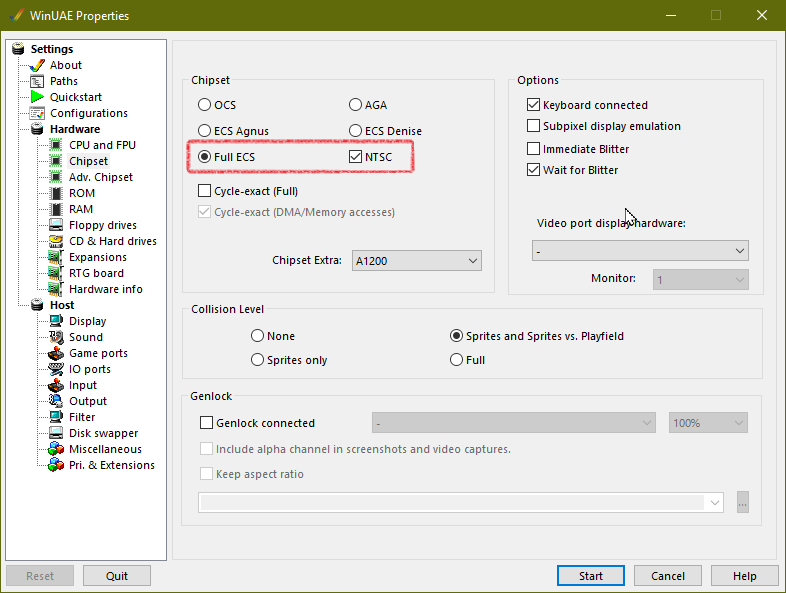
Next, set the Chipset to Full ECS. Make sure the box labeled NTSC is checked.
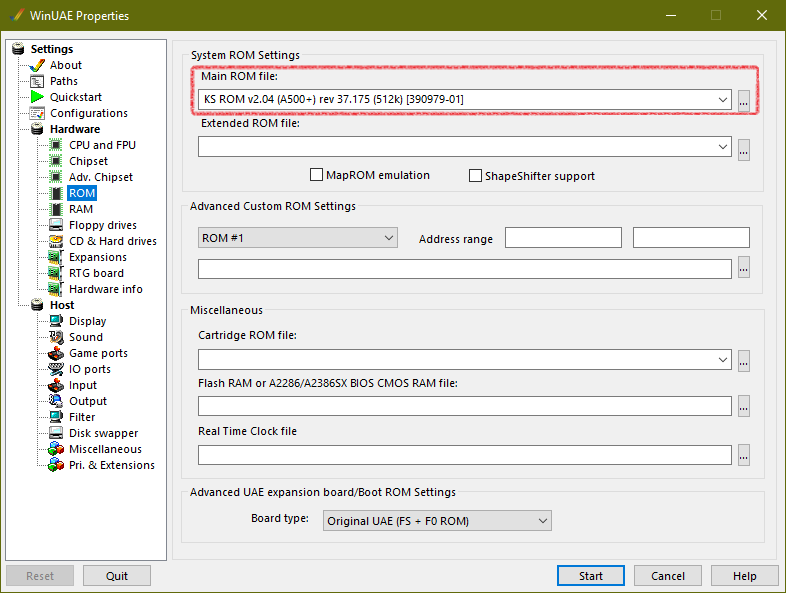
Under ROM, choose KS ROM v2.04 (A500+) rev 37.175 (512k) as the Main ROM file.
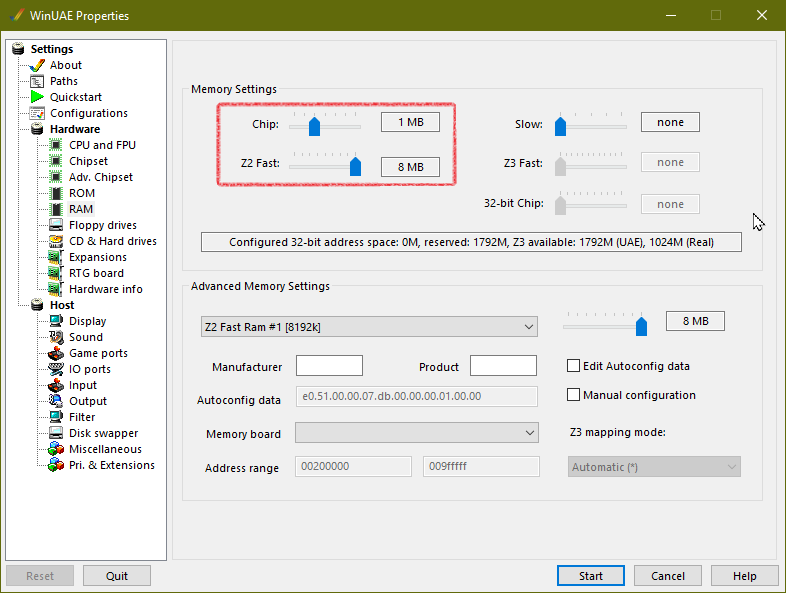
Under RAM, set the Chip slider to 1 MB and the Z2 Fast slider to 8 MB.
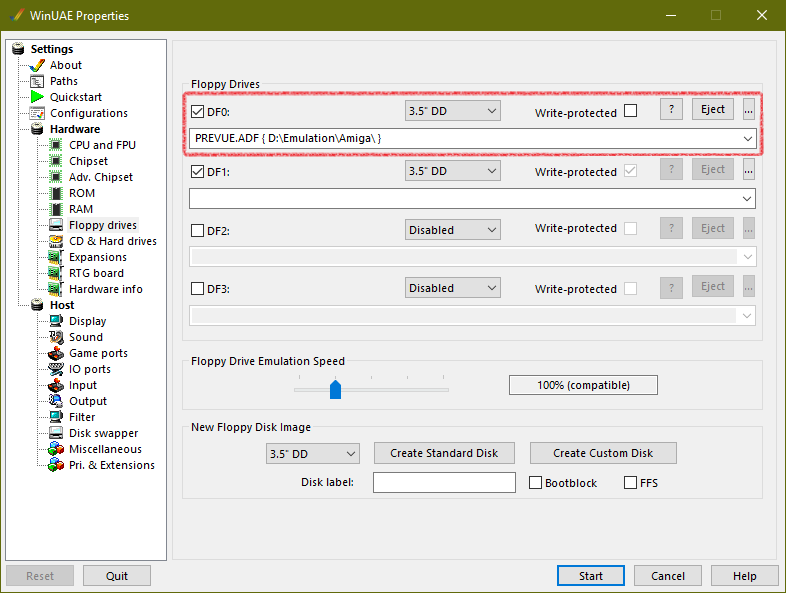
If you downloaded any of the ADFs from earlier, you will need to mount them in DF0. Make sure that write-protection is not enabled.
Optionally, you can set the Emulation Speed to Turbo if you prefer, especially if you set the CPU speed to ‘fastest possible’ earlier.
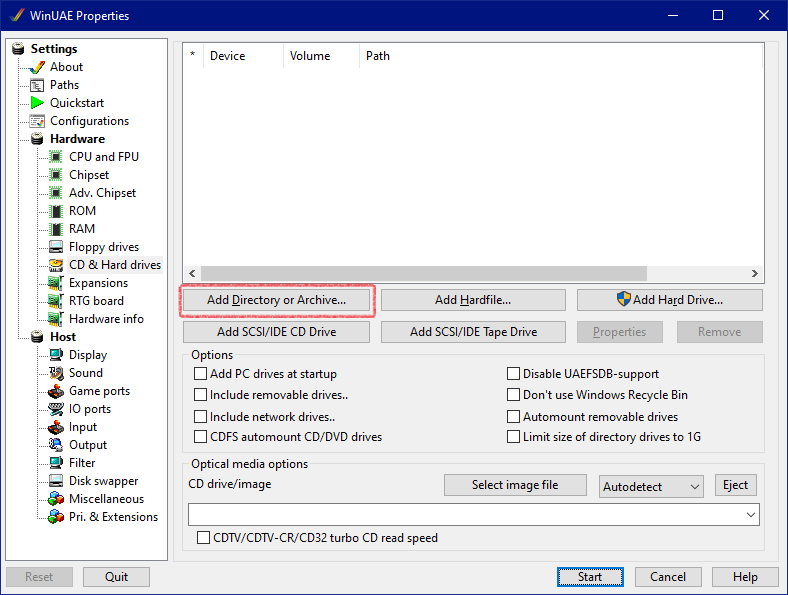
If you downloaded the Zip archives, you will need to mount them as a hard drive.
First, extract them into a folder of your choosing, copy the extracted file path, then go into CD & Hard drives and click Add Directory or Archive...
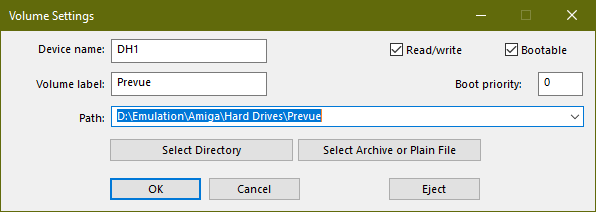
Set the device name to DH1, put in whatever for the label, and paste the path into the Path field. Finally, make sure Read/write and Bootable are checked, then click Create.
If you're running the Prevue Channel software in this manner, you will also need to make sure DF0 is disabled, otherwise the software will constantly throw errors about the system disk not being in drive 0 and you will not be able to view graphic ads nor make any changes.
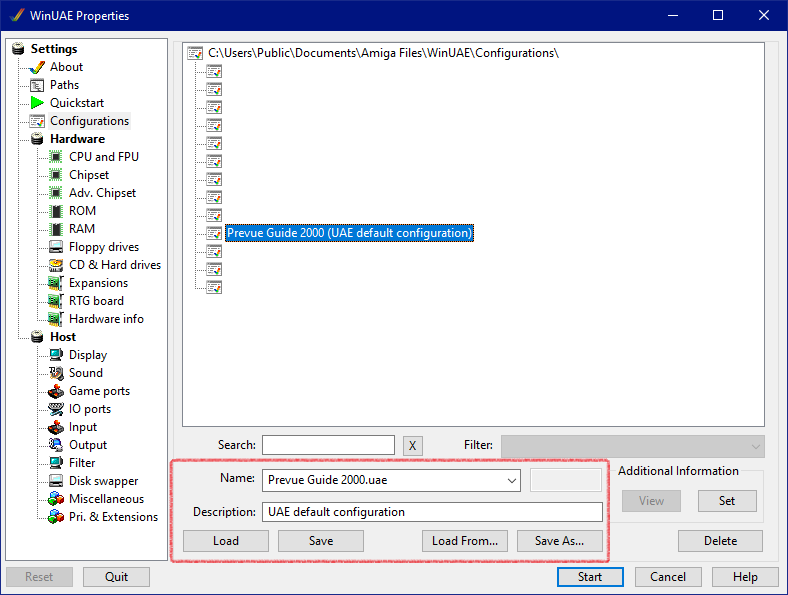
If you don't want to set all of these up again, you can save the Configuration by going into Configurations, setting a name and clicking Save.
Make sure it works by clicking Start. If you ever need to make any additional changes, press F12 to pause emulation and return to the Configuration window.
Once emulation has started, you should see a terminal reading something like:
Loading PREVUE Software...
Please Wait...
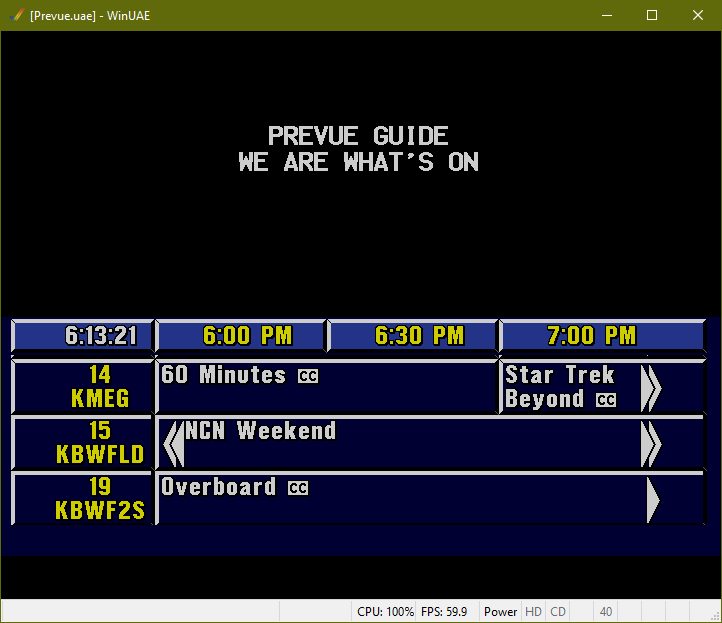
After a few seconds, the screen should glitch and transition into a screen like this:
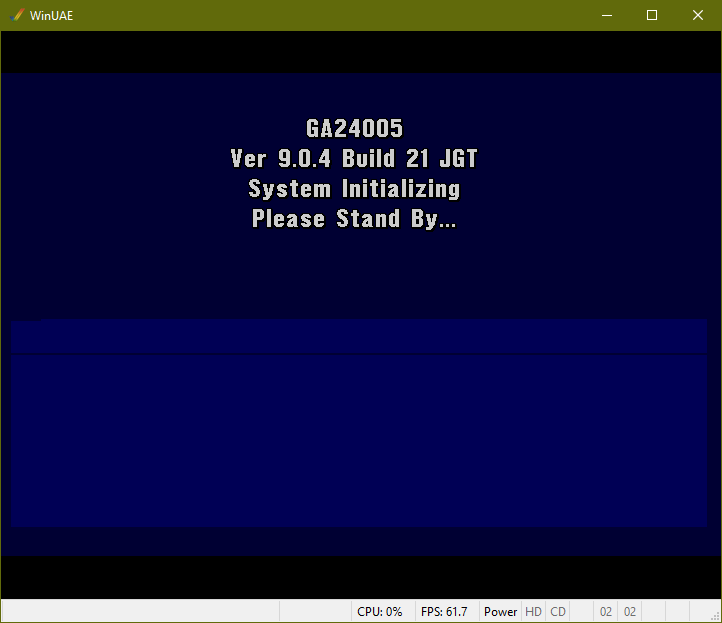
If all has gone well, then congratulations! You now have a functioning Prevue Channel.
If this is your first time running the software, then chances are that you will see a red listing scrolling past reading Please Stand By for your Local Listings. ER007. This means that there are no listings at the current time on this day.
By default, both the ADFs and Zip archives contain cached listings from December 13, 1999, which seems to be the last time listings were ever saved prior to its decommissioning. If your host computer's month and day are set correctly, then listings from that time should pop up.
If you want to populate the guide with current listings, you will need to use a data sender such as PrevueCLI or PrevueCommander and an XMLTV-formatted file with listings of your choosing. This can be acquired through utilities like mc2xml and zap2xml or paid subscription services such as Schedules Direct or Perc Data, which pull from Gracenote.
Guides on how to set these up can be found here:
Once you've acquired your data, open the WinUAE configuration (press F12 if you are running it) and go to IO ports under Host.
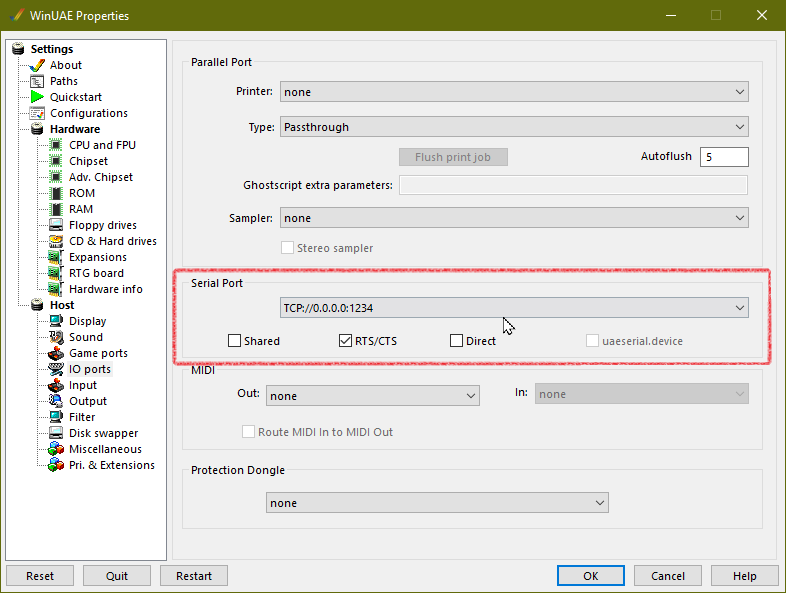
In the Serial Port field, open the dropdown and either select your serial port (if you are sending over serial) or TCP://0.0.0.0:1234. Save the configuration.
serial_port.Click Restart, load the configuration, and click Start. NOTE: If a Windows Firewall prompt appears, be sure to allow access to all connections, otherwise it might not work.
Following the instructions on the PrevueCLI page, if everything was followed successfully, you should start seeing listings rolling in.